Weight loss and fitness take patience, time, and discipline; if things are pushed too soon, other problems can arise. It can take 6-12 weeks to return to a pre-pregnancy state – sometimes longer – so don’t give up!
With proper training, and beginning as early as 24-48 hours after birth, you can avoid many problems and work toward rebuilding and toning your body the right way.
Always check with your doctor before beginning this routine, since all mothers and all deliveriesare different. Restrictions may apply to you that prevent your doing theseexercises immediately. Begin only when your doctor clears you, and always remember that patience and time will help – so don’t get discouraged!
If your ribs and upper back move, like in a crunch, the upper portion of yourabs is emphasized. However, if you move your pelvis and lower back, the lower abs are emphasized. So in order to emphasize your lower abs your pelvis must move or abs must work to keep your pelvis stable when your legs move.
Learning the art of Breathing

The skin and muscles tend to become loose and jelly-like and might lack the neuromuscular awareness to work properly. This is why it is important to usebreathing techniques in order to shorten the abdominal wall to its previous length. As you inhale, your chest and abdomen should expand; as you exhale, your chest and abdominal wall should flatten. This concept is important when retraining your core after birth. The muscles in your belly must shorten before they can be strengthened. Exhaling while pulling your abs in shortens and strengthens with each outward breath.
As the body’s balance changes with enlargement of abdomen, it is important to take your centre of gravity downward, while keeping your spine stretched up and your chest open. This upright, graceful stance will make you feel elegant and confident and also allows more space to be created around the diaphragm, which needs to find room to contract downward so that you are able to breathe really deeply and fully.
Beginners exercises
In addition to breathing exercises a women can begin with postnatal exercises after 24-32 hrs of normal delivery. Additional exercises that can be taken over are:
- Kegels (Pelvic floor contractions): Kegel exercises strengthen the pelvic floor muscles, which support the uterus, bladder and bowel. Can be done in any position. Tighten and hold for 5 seconds. Do several times a day. For more on Kegel, click here.

- Pelvic Tilt: While lying on your back with your knees bent, tilt your pelvis backward as you tighten your abs and exhale. Try to bring your belly button to your backbone as you push your low back into the mattress/floor. Hold for 5 seconds, inhale, and relax.
- Stretch out: Lie on your back with arms and legs out straight, palms up. Bend at the ankles so toes are aiming for the ceiling, tighten thigh muscles and push knees into the bed/wall. Pull your abdominal muscles in and flatten your back. Squeeze your shoulder blades together and elongate your neck. Press your hands back into the bed and hold this for a few seconds, then relax. This allows your muscles to contract isometrically (without changing length), which is safe on the body and provides an easy readjustment to normal posture after birth.
- Posture Correction: Standing – tuck your chin in to elongate the neck, pull your shoulders down and back, tighten your abdominal muscles while pulling your belly into your backbone, tighten your pelvic floor, keep knees soft, and increase the arch in your foot.
Additional Exercises:

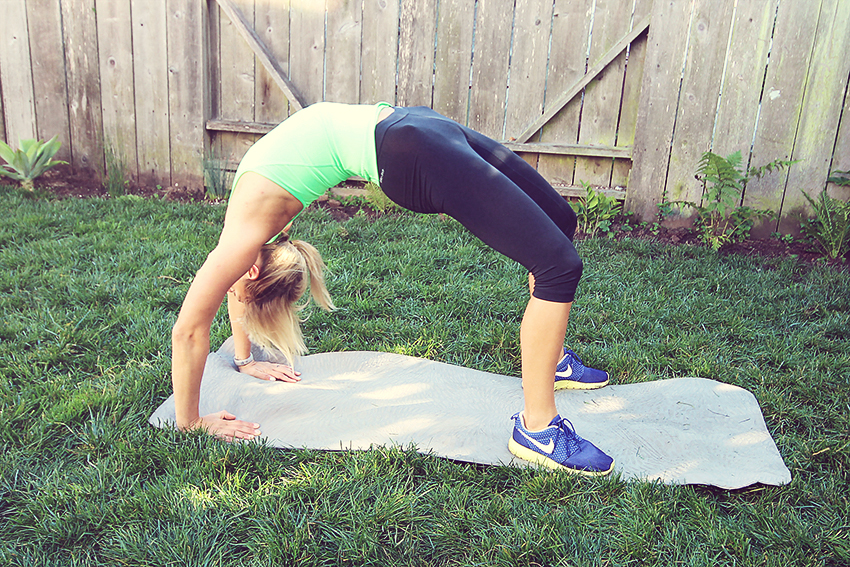
- Bridge: Lying on your back with knees bent, contracting your abdominal, buttock, and pelvic floor muscles, and raise the hips up off the floor. Hold for 5 seconds and relax down slowly. The farther your feet are from your buttocks the more challenging it will be.
- Heel Sliding: Lying on your back, tighten your abdominal muscles and do a pelvic tilt. Slowly slide out one leg at a time while tying to maintain your pelvic tilt. You can progress to sliding both legs out together as long as you can keep the pelvic tilt and not allow the back to arch. Always bring legs back one at a time.
- Butterfly crunch: For this crunch, you will lie on the ground again, with your feet flat on the floor, knees bent. Take your knees and spread them out to the floor if you can, with the soles of your feet together, creating a large diamond with your legs. From this position, press your back into the ground as much as you can and slowly lift your upper body from the floor a few inches. Again, don’t worry about this being a large lift, just engage the muscles, breathe out, and breathe in as you slowly lower down.
- Curl ups: Lying on your back, begin with arms outstretched, exhale, and pull your belly into your spine as you slowly reach with your hands towards your knees. Only roll up until your shoulder blades lift off, then inhale and slowly lower. Be sure your stomach flattens (not expands) as you rise. Also, try diagonal curl ups by reaching right arm past left knee as you curl up, and vice versa. You can increase the difficulty by changing arm positions, from easiest to hardest – arms outstretched, arms crossed across chest, and arms crossed behind head.

- Bicycle kick: Lie on your back on a mat or padded carpet with your knees bent and feet flat on the floor. Press your lower back into the floor, engaging your abdominal muscles, as you put both hands behind your head (don’t pull on your head). Bring your right elbow over to your left knee, and then bring your left elbow over to your right knee in a twisting, bicycle pedal motion. Continue to breathe naturally and maintain a pelvic tilt. Alternate opposite elbow to opposite knee with hands interlaced behind your head in a slow and controlled manner and with full extension of each leg on every repetition. Your abdomen should be flattening with exhale, not bulging.

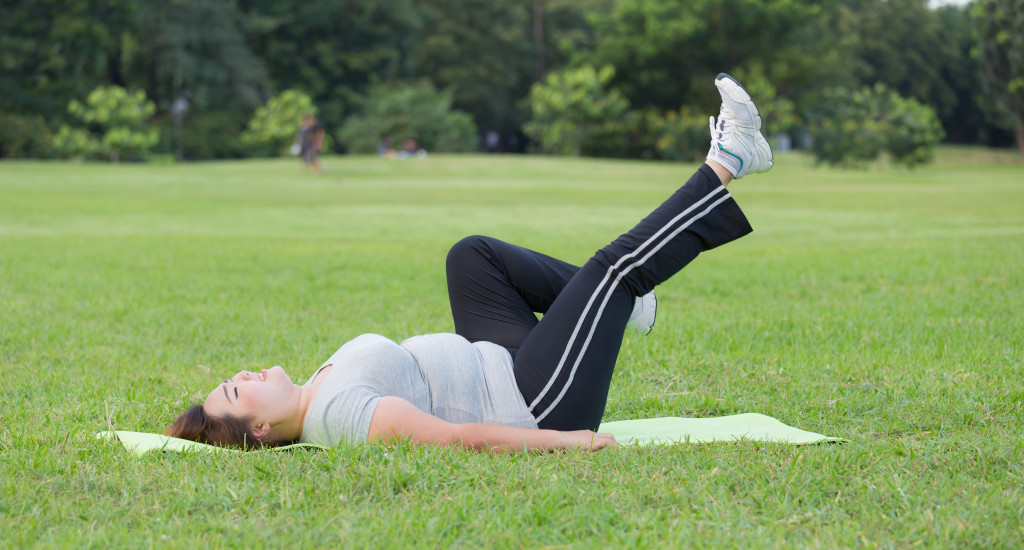
- Double leg raise: Maintain pelvic tilt as you lower your legs, starting with knees bent and straightening legs out as you lower. Only lower as far as you can maintain your pelvic tilt. Once you feel your back begin to arch, return legs one at a time to starting position. Double leg raising will work your hip muscles and is too much pressure on your spine and abdominal muscles – LOWER with both legs but RAISE one at a time.
In case of vaginal birth you start off the exercises early but in case of cesarean section give some time to your body to recover. You can however practice deep breathing, posture correction and complete body stretching.
As with any exercise program, lower ab toning exercises after pregnancy need to be started off slowly and then slowly made more challenging with more repetitions and possibly even some weights for resistance. With these core training exercises after pregnancy, you will not only be a fit and healthy mom, but you’re also going to look good while you do it.
What is Diastisis Recti?
A spreading of the midline of the abdominal wall, it is usually detected in later pregnancy, and is present if you can feel a separation of greater than three fingers. The extent of diastisis should be checked three dayspostpartum by lying on your back with knees bent, placing fingers in midline of abdominal wall and lifting your head up. Feel for the separation below your fingertips; if it’s greater than three fingers, make the exercise modifications outlined above until the diastisis is corrected.
Note: Before you do any lower ab toning exercises after pregnancy, make sure that you get the permission of your doctor. In some cases, you may need to wait for a few weeks to start any exercise program in order to let an episiotomy or a cesarean scar heal completely.